Sowing seeds can sometimes be fiddly. Tiny seeds, like poppies, foxgloves, or mint, can be difficult to handle and space evenly, often resulting in clumps that need tedious thinning later on. Conversely, trying to achieve an even spread when broadcasting seed over a larger area, like for a meadow planting or lawn, presents its own challenge. Uneven sowing leads to wasted seed and patchy results.
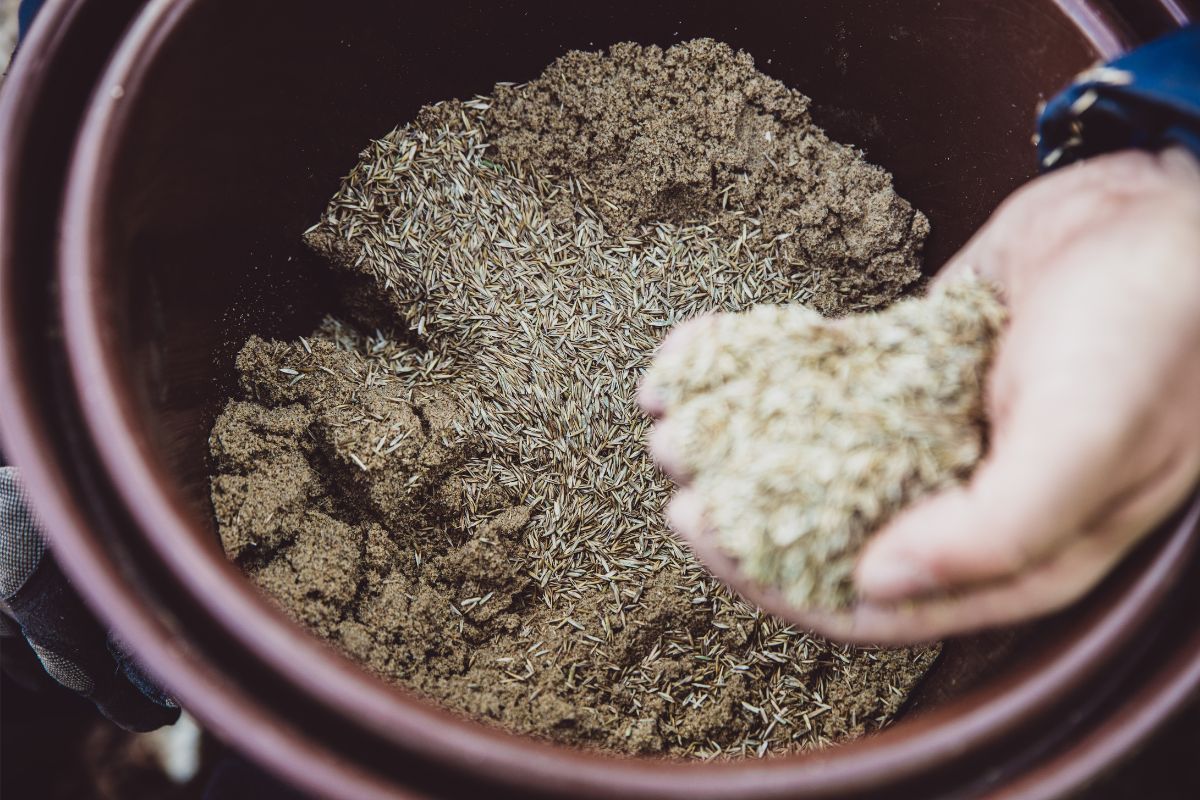
Fortunately, there's a simple, effective, and inexpensive solution: mixing your seeds with sand before sowing. This technique uses sand as a bulking agent, making seeds easier to handle and distribute evenly, whether you're dealing with minuscule seeds or covering broad areas.
This article will explain why sand mixing works so well, guide you on choosing the right sand (and what to avoid), suggest mixing ratios, and provide practical steps for using this method effectively.
Why Mix Seeds with Sand?
Mixing seeds with sand increases the volume you're working with, making a small quantity of seed easier to handle and distribute evenly across the soil. This simple principle offers significant benefits in two common scenarios.
Handling Tiny Seeds
Seeds like poppies, foxgloves, petunias, lobelia, oregano, thyme and mint can be incredibly small. This presents several challenges:
- Handling Difficulty: They are hard to pick up and easily lost.
- Over-sowing: It's easy to sow them too thickly, leading to crowded seedlings competing for resources.
- Waste and Thinning: Overcrowding wastes seed and requires careful thinning, which can damage the remaining seedlings' roots.
Mixing these tiny seeds with sand makes the mixture easier to grasp and sprinkle thinly. The sand separates the seeds, promoting better spacing from the start. Lighter coloured sand also provides a visual guide against darker soil, helping you see where you've sown.
Even Coverage for Large Areas (Broadcasting)
Achieving even seed distribution when establishing a wildflower meadow, sowing a lawn, or planting larger crops can be difficult. Hand scattering or using spreaders often results in uneven patches.
Mixing seed with sand adds bulk and weight, regulating flow from spreaders and making hand broadcasting more controlled and uniform. Dividing the mix in half and applying it in perpendicular passes (e.g., North-South, then East-West) further improves evenness.
The sand's visibility helps track coverage, and its weight helps seeds settle onto the soil, resisting wind drift and improving crucial seed-to-soil contact for germination.
Choosing Your Sand Wisely (and What to Avoid)
The goal is to use a sand that provides bulk and separation for easier sowing, without creating problems like compaction right around the seed.
Recommended Types:
- Horticultural Sand: Specifically processed for garden use, it's gritty, washed, graded, and often lime-free (pH neutral), making it a safe choice. Find it at garden centres and nurseries.
- Builder's Sand (Coarse): A common, economical option from hardware stores and building suppliers. Ensure it's coarse (sometimes called concrete sand), not the fine sand used for bricklaying mortar. Coarse builder's sand can contain silica dust, so consider wearing a mask if handling large dry quantities.
- Coarse Sand / Grit: These terms refer to sand with larger, angular particles. The angular shape helps prevent the particles from packing too tightly immediately around the seed. Available at building suppliers or landscape yards.
Whichever sand type you choose it's import to make sure it's washed and free from fine silt, clay, salts, weed seeds or other contaminants. Horticultural and concrete sand are usually washed so are usually the best choice.
Sand to AVOID:
Play Sand / Sandbox Sand / Fine Sand: Do not use this for mixing with seeds. The particles are very small and often rounded. When wet, they pack together tightly, creating a dense, airless environment right around the seed that hinders germination and root growth – the opposite of what's needed.
Alternatives to Sand
If suitable coarse sand isn't available, other fine, inert, or organic materials can serve as carriers:
- Vermiculite: Lightweight, holds moisture and air well, good for tiny seeds.
- Perlite: Primarily adds aeration.
- Fine, Sieved Compost or Seed Raising Mix: Can add nutrients, but must be fine, free-flowing, and weed-free. Both are best used dry.
The principle remains the same: add bulk for easier, more even distribution without negatively impacting germination.
Getting the Mix Right: Sand-to-Seed Ratios
There's no single perfect ratio; it depends on seed size, area size, sowing method, and personal preference. Feel free to experiment!
As a starting point, for handling tiny seeds, a ratio of 1 part seed to 4-10 parts sand (by volume) is recommeded. Some gardeners use a simple pinch of seed to a tablespoon of sand for small quantities. This dilution makes handling easier and promotes better spacing.
For broadcasting over large areas, a higher proportion of sand is typically used to add sufficient bulk for even spreading. Ratios anywhere from 1 part seed to 5 parts sand, up to 1:20, are common. The key is to add enough carrier material to allow for controlled distribution by hand or spreader.
A higher sand ratio (e.g., 1:20) results in a more diluted mix, making it easier to achieve sparse sowing. A lower ratio (e.g., 1:2) gives a more concentrated mix. Adjust to suit your specific needs.
Simple Steps for Mixing and Sowing
- Prepare Your Soil: Ensure the area is weed-free. Loosen the soil and rake to a fine, level tilth. Remove large debris. Lightly pre-watering helps seeds stick.
- Ensure Sand is (Mostly) Dry: Dry or slightly damp sand flows best, especially for spreaders. Slightly damp sand can help seeds adhere for hand broadcasting but avoid wet, clumping sand.
- Mix Seed and Sand Thoroughly:
- Small quantities: Use a clean jar, bowl, or simply add the sand to the seed packet. An old spice shaker works well as an applicator.
- Larger quantities: Use a clean bucket, tub, or wheelbarrow. Mix well by hand (use gloves if desired) or with a trowel. For very large areas, mix with a shovel on a clean tarp.
- Scatter the Mixture Evenly:
- Hand Broadcasting: Use a consistent, sweeping motion. Walk systematically. Use the perpendicular pass method for large areas. Practice with just sand if unsure.
- Using a Shaker: Gently shake over drills or seed trays.
- Pinch and Sprinkle: For very small sowings simply pinching and sprinkling seeds is also an effective method.
- Using a Mechanical Spreader: Calibrate first according to instructions, starting with the smallest setting and testing on a tarp. Walk at a steady pace.
- Cover Lightly & Ensure Seed-to-Soil Contact: Crucial for moisture uptake.
- Gently rake soil over seeds. Aim for a covering depth similar to the seed's diameter – tiny seeds need very little or no cover. Pressing them firmly onto the soil might suffice.
- Alternatively, sift a fine layer of compost, seed mix, or more sand over the area.
- Gently firm the soil using a rake, or your hands.
- Water Gently: Use a fine spray immediately after sowing. A watering can with a fine rose or a hose on a mist setting is ideal. Keep the area consistently moist until seedlings establish.
***
Mixing seeds with sand is a simple, low-cost way to overcome the challenges of handling tiny seeds and broadcasting evenly over large areas. Sand acts as a carrier, improving distribution and spacing, which reduces thinning, saves seed, and leads to healthier plants. It’s a straightforward technique that can significantly improve your sowing success and might just become a regular part of your gardening routine.
.jpg)