If you are looking for a simple way to manage your kitchen scraps and other organic waste, then an in-ground composter might be just what you need. Simply bury your in-ground composter directly in your garden and fill it with kitchen scraps.
The decomposing organic matter releases nutrient-rich moisture directly around the roots of your plants. Once the scraps have turned into “black gold” after a few months, lift the composter out, spread the contents around your plants, and set it back in place to begin again.
Whether you have a raised bed, greenhouse, or any other style of garden, an in-ground composter is a simple and easy way to turn your kitchen waste into valuable compost for your garden.
What is In-Ground Composting?
The most common way to make compost is to combine quantities of carbon-rich brown matter (like straw or leaves) with nitrogen-rich greens (such as lawn clippings or kitchen scraps) into a bin, tumbler, or even a big heap which you turn every few weeks. Unfortunately, this process can be time consuming and takes up a lot of valuable growing space.
In-ground composting, on the other hand, lets you bury your organic matter directly in the garden where it breaks down right in the soil. There is no turning required, and the compost does not take up valuable growing space.
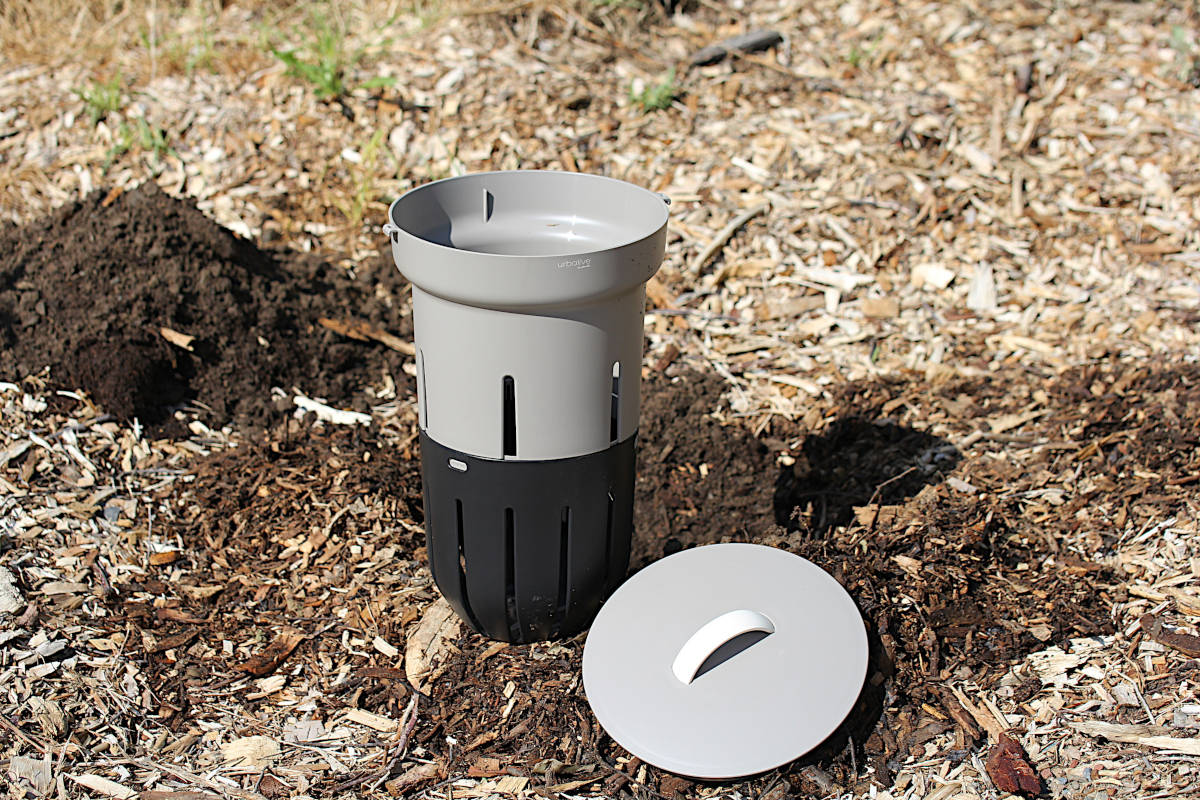
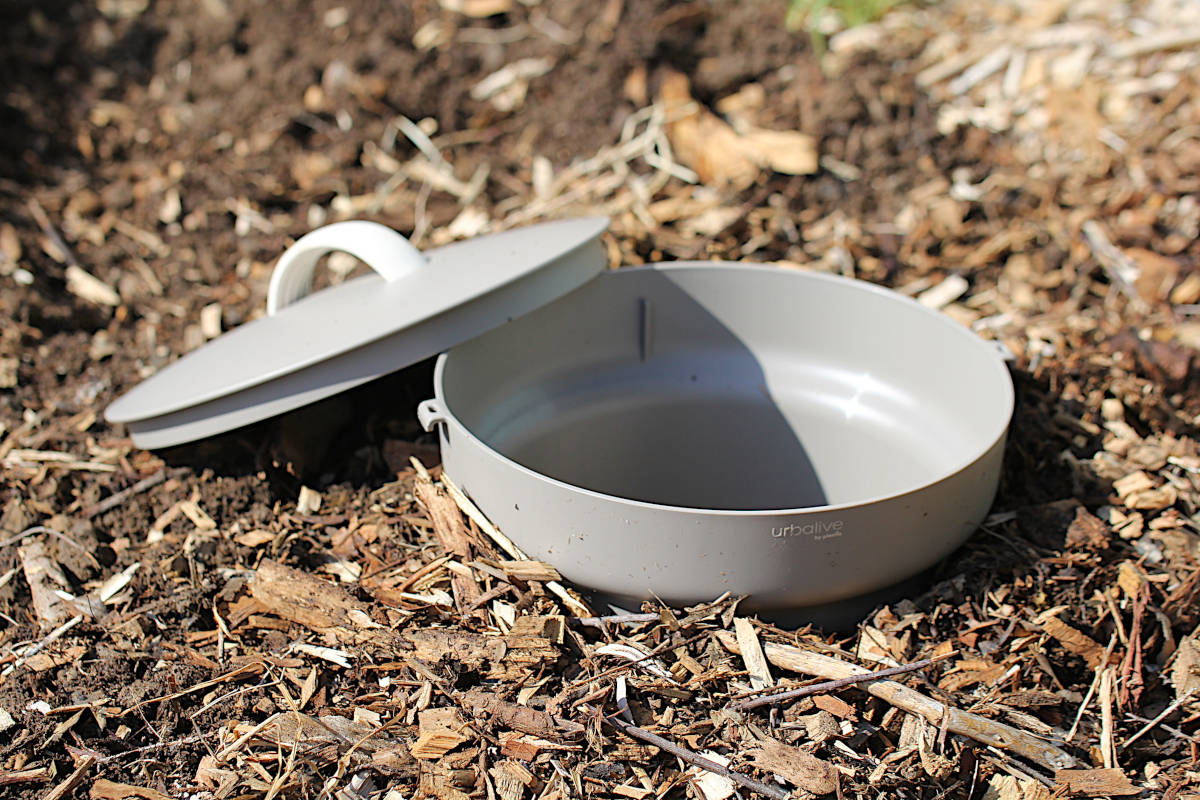
Many garden centres now sell in-ground composters. These are typically plastic cylinders with slits in the bottom to let earthworms in and excess moisture out. They also come with a lid to reduce smell caused by decomposition, and to keep out unwanted animals such as rodents, insects like fruit flies, and other creatures like slugs and snails.
In-ground composters are often called in-ground worm bins, and many growers add worms to the mix. However, this isn’t really necessary as the organic matter in the composter will attract plenty of worms on its own.
Benefits of In-Ground Composting
In-ground composters are ideal for any garden whether you grow directly in the soil, in a raised bed, or greenhouse. Benefits include:
- Avoid smells: Excess liquid that is often responsible for “smelly” compost will naturally drain out the bottom of the composter into the surrounding and so reduces smells.
- Moisture for plants: This excess moisture drains right into soil where it provides nutrient-rich moisture for your plants.
- Efficient decomposition: If compost dries out, the decomposition process grinds to a halt, but in-ground compost remains sufficiently moist.
- Space saving: Since the composter is buried in the ground, you don’t need extra space for compost bins or piles.
- Aesthetically pleasing: In-ground composters blend in with the garden so you hardly notice them.
- Attracts soil microorganisms: They create an ideal environment for beneficial soil microorganisms to thrive.
- Feeds the worms: Earthworms will come in droves and the composters allow for natural movement of the worms in and out of the bin. The worms help decompose the organic matter and provide other benefits to the garden by spreading castings, aerating and loosening the soil, and improving drainage.
- Regulated temperature: Above-ground compost is affected by the changing weather, but in-ground composting regulates the ideal temperature for decomposition.
- Avoids growth problems: Growing plants directly over decomposing organic matter can lead to growth problems.
- Keeps out pests: The composters keep rats, mice, dogs, cats, and other “pests” out of the compost.
Things to Consider Before Getting Started
There are many advantages to using in-ground composting units. The only real limitation is the smaller capacity of the composters. While above-ground piles can hold as much organic matter as you want, these smaller underground units only hold a limited amount of kitchen scraps. Also, once they are full, you need to wait until they are finished composting before you can add more scraps.
Thankfully, both of these problems can be solved by using two (or more) in-ground composters. The first composter can continue decomposing organic matter while you are filling the other. Then, when the first one is ready to spread on the garden, empty the contents and start filling it up again, while the other composter continues decomposing, and so on.
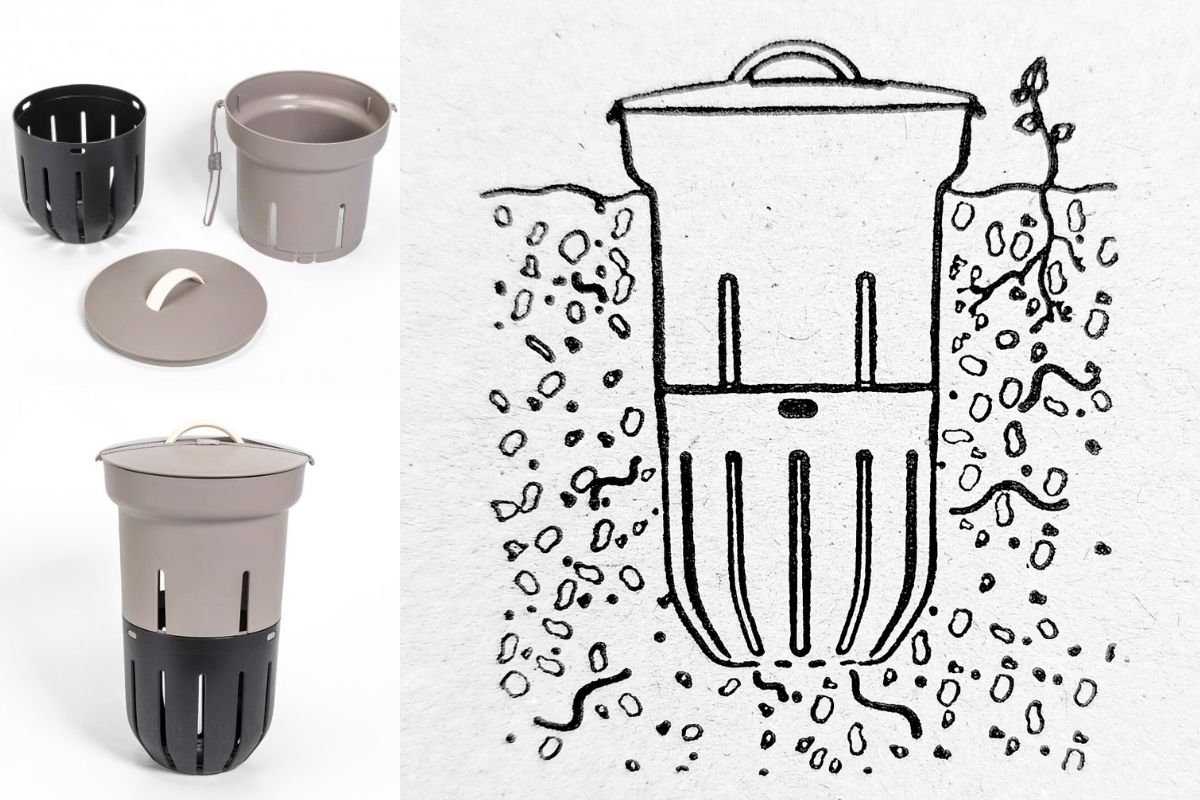 An in-ground composter like this one is easy to assemble and easy to clean, has a secure lid to keep out rodents, and allows allows free and easy movement of earthworms in and out of the composter so they can help break down the compost.
Using Your In-Ground Composter
If you think in-ground composting will work for you, here is an easy step-by-step guide to get you started and growing in no time:
1. Dig a Hole
Ideally, you want to install your in-ground composter in your garden where the plants can make use of the nutrients from the compost. Choose somewhere with easy access that you can reach without damaging the surrounding plants. If possible, install the composter before planting or sowing time to avoid disturbing the roots or seeds.
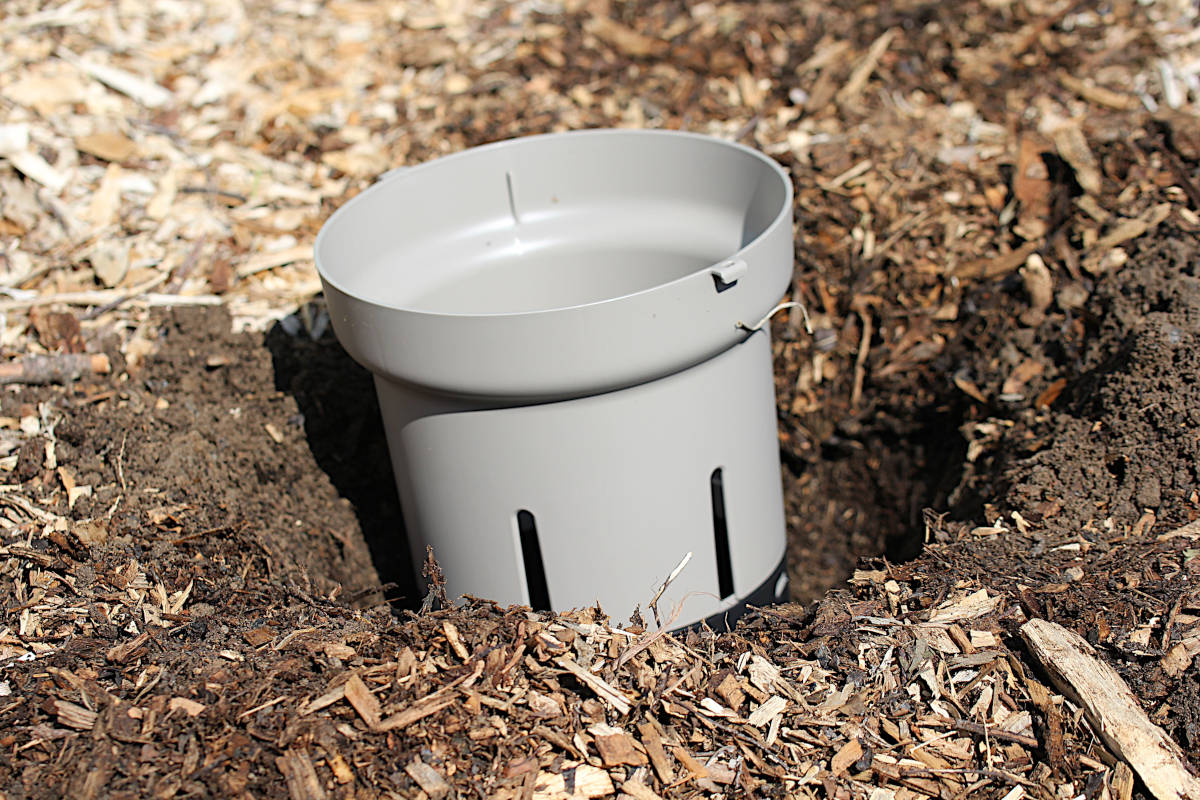
Dig a hole large enough to accommodate the unit. Most in-ground composters are around 50cm deep and around 30cm across, but check the product specifications to be sure.
2. Install the In-Ground Composter
Assemble your composter (if required) and set it in the hole to the proper depth. Then, backfill around the composter to make sure it is nice and snug in the soil.
3. Add Food Scraps
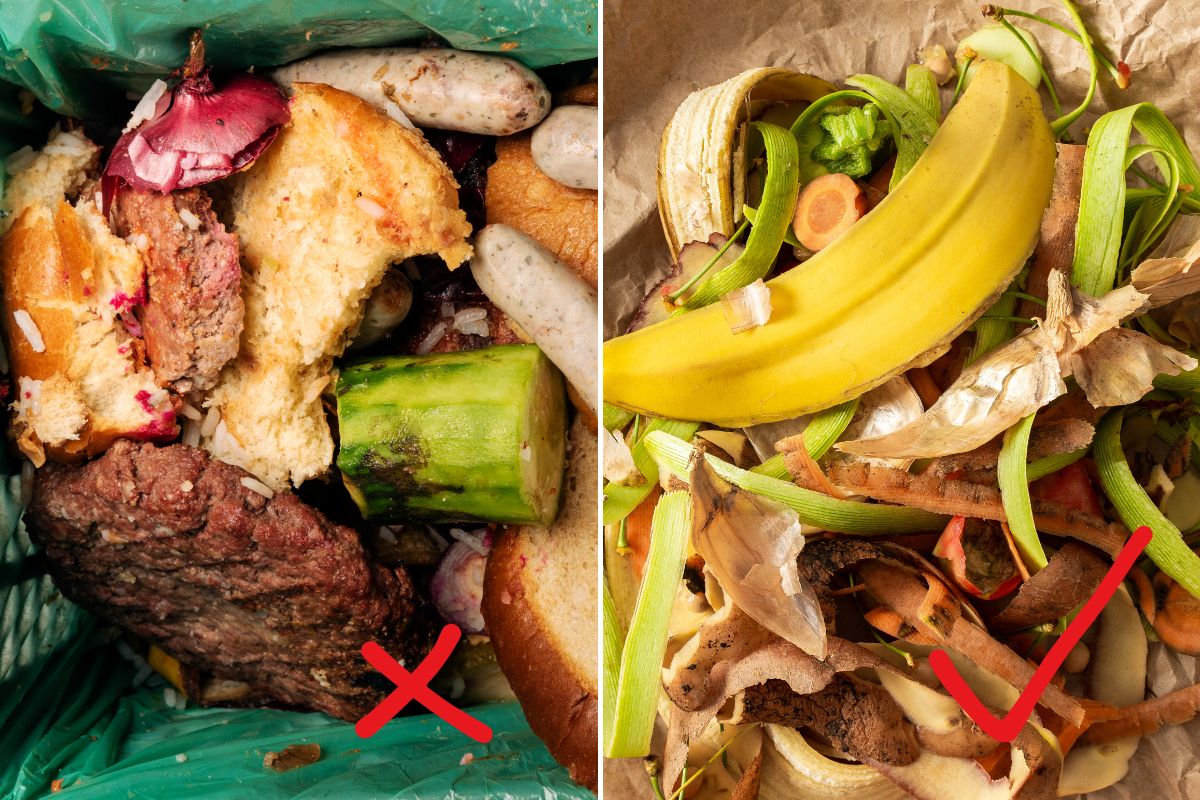
Fill your in-ground composter with kitchen scraps or other organic matter, including:
- Vegetable and fruit scraps (either cooked or raw)
- Compostable tea bags
- Coffee grounds and filters (in small quantities)
- Finely crushed egg shells (they probably won’t break down, but are fine to use)
- Dry bread (avoid overly sweet baked goods like cakes, donuts, etc.)
- Chopped up plant matter (like lawn clippings, dead plants, etc.)
Separating your organic matter in layers of browns and greens can aid decomposition but isn’t necessary.
AVOID meat (fish, poultry, bones, etc.), dairy products (milk, cheese, etc.), faeces (dog, cat, and human), strong flavoured vegetables (ginger, citrus, garlic, hot peppers, etc.), and oily foods or fat.
Once the composter is full, it is a good idea to water it once to make sure it starts off with enough moisture for decomposition. From then on, the moisture from the soil should be sufficient to keep things going.
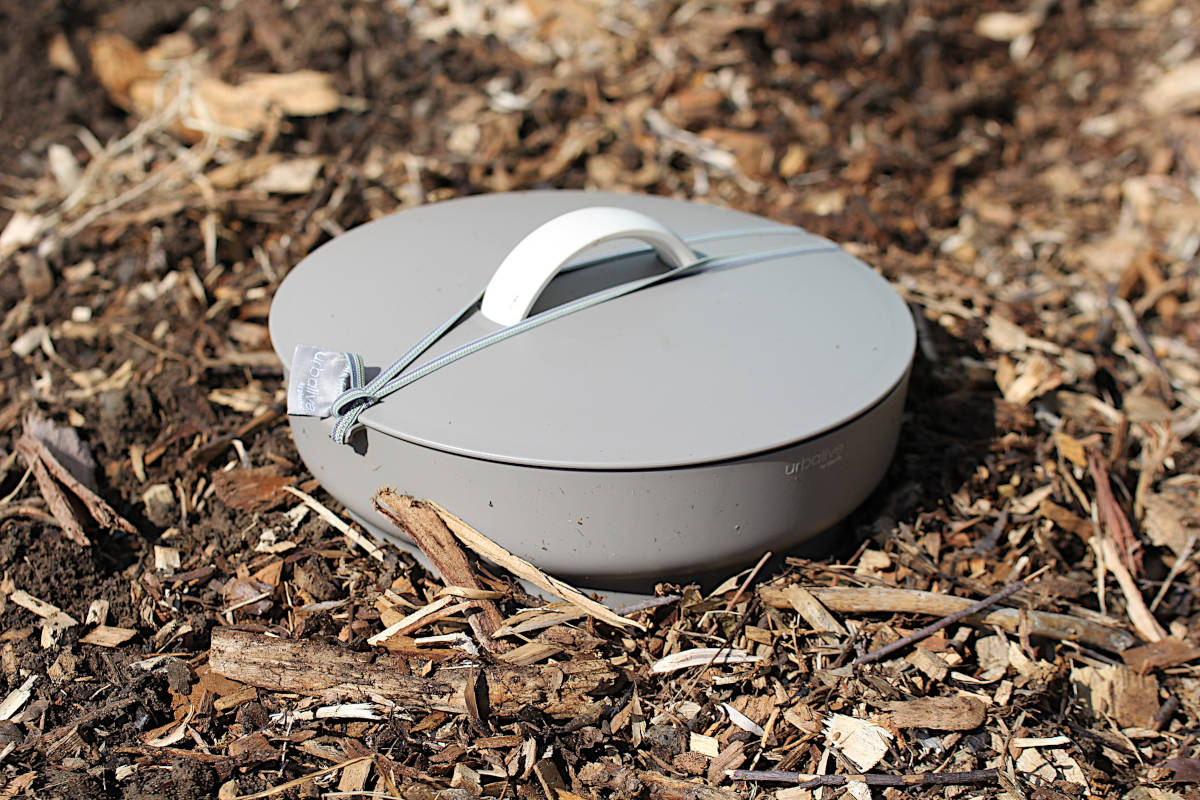
4. Put on the Lid
Using the lid on your in-ground composter will reduce smells and keep pests out. Make sure the lid is securely attached to keep it from blowing off or from animals dislodging it.
5. Let Things Decompose
In most cases, the organic matter in your in-ground composter will decompose in around 2 to 6 months depending on the moisture and temperature in your area. In-ground composters will work all year round, but keep in mind the decomposition process will be slower in winter.
6. Empty and Repeat
Your compost will be ready to use once it is rich black earth with no recognizable plant matter left. Scoop out the contents and spread around your garden. Then simply start filling it again!
 Avoid adding kitchen scraps that contain meat or dairy products, oily foods or fat, and strong flavoured vegetables to your in-ground composter. They do not decompose quickly enough and rotting meat will begin to smell and can attract vermin.
In-Ground Composting Without a Store-Bought Solution
You can easily make compost in the ground without a store-bought product. Trench composting, where you bury organic matter directly in the soil, is an efficient and hassle-free way to add nutrients and build your soil. Or you can simply dig a hole, dump in your kitchen scraps, and cover over with soil.
You can also make your own DIY in-ground composter by upcycling a plastic milk crate, or drilling holes in the bottom of a lidded 20 litre bucket and burying them in your garden.
Compost is the best soil amendment you can add to your garden. It builds the soil, improves drainage and aeration, and provides nutrients to your plants. If you don’t have time to manage a compost pile, or maybe you don’t produce enough kitchen scraps to keep a pile going, then try an in-ground composter for a simple and easy way to manage your compost.