How to Grow Youngberry Canes
Grow Guide #2999
Family: Rosaceae
Binomial name: Rubus ursinus
Life Cycle: Perennial
This 'How to Grow' guide details everything a home gardener needs to know to plant, grow and care for Youngberry (Rubus ursinus).
When to Plant Youngberry Canes
Youngberry is a perennial plant that grows year round. Plants need a cool winter to produce fruit. Use the table below to identify the best time of year to plant youngberry canes in your climate.
| JAN | FEB | MAR | APR | MAY | JUN | JUL | AUG | SEP | OCT | NOV | DEC | |
|---|---|---|---|---|---|---|---|---|---|---|---|---|
| Cool | ||||||||||||
| Temperate | ||||||||||||
| Sub-Tropical | ||||||||||||
| Tropical | ||||||||||||
| Arid |
Preparation
Youngberry plants are perennial, meaning they live for several years. Choose a permanent position where plants can grow undisturbed by regular digging.
Youngberry plants are best grown in full sun or part shade. Choose a location that will receive at least 3 hours of full sun each day.
Youngberry plants need a well drained soil enriched with plenty of organic matter. Prepare soil by weeding it thoroughly, digging it over to loosen it and adding aged animal manure or compost. Keep the area free of weeds until planting. Learn more about preparing soil for planting here.
How to Plant Youngberry Canes
Plant youngberry canes soon after delivery. Do not allow roots to dry out.
- Remove cane from bag and shake off coir. Soak the roots in a bucket of water for 1-2 hours prior to planting. Do not leave roots soaking for longer than 2 hours or they may rot. Optional: Seaweed solution can be added to the soaking water at the recommended rate if desired.
- Space canes 150-180cm apart.
- Dig a 30cm deep hole and make a mound in the centre.
- Place the roots of the cane on the mound and spread them out evenly.
- Cover with soil, making sure the bottom of the stem is level with the surface of the soil.
- Water in well after planting.
Optional: Prune canes to about 20cm from the ground after planting. This will encourage root development and new growth.
How to Grow Youngberry Canes
Youngberry plants require a trellis or other strong support to grow on. Tie plants gently to the support using twine or plant ties. Make sure you have the support in place when you plant canes to avoid disturbing the plant’s roots later. Tying the canes to the trellis in bundles and training them in a wave shape along the trellis can make them easier to manage.
Youngberry plants may need watering during the growing season. Water when the soil is dry about 5cm below the surface (test this by scratching away a little soil with your finger). Water deeply in the early morning or late afternoon. Avoid watering the leaves of plants to avoid fungal diseases. Learn more about watering here.
If soil was well prepared no extra fertiliser should be necessary. In poor soil or to give your plants an extra boost, application of a balanced fertiliser or one formulated for fruit and vegetables can be beneficial:
- Apply slow release fertiliser at the recommended rate when transplanting or when seedlings are 5-10cm tall.
- Apply liquid fertiliser at the recommended rate and frequency while plants are fruiting or flowering.
How to Prune Youngberry Canes
Youngberries produce fruit on two-year-old canes (called floricanes). There are two commonly used methods for pruning boysenberry canes:
Method 1: Mark the canes that produce fruit with a soft tie such as a length of wool while they are fruiting. This will help you remember which canes have fruited. Prune the canes that have fruited to the ground in winter, leaving the new canes that did not fruit unpruned - these new canes will produce fruit next year.
Method 2: Tie the year-old canes into a bundle and train them to the higher wires on the trellis. Tie the new canes to the lower wires as they emerge during the growing season. In winter, prune the old canes to the ground. Tie the new canes into a bundle and train them to the higher wires, ready for the next growing season.
Plants can be pruned during the season to encourage branching, to remove any weak, diseased or damaged canes and to improve air flow around canes.
Youngberry plants may produce suckers (new shoots that emerge some distance from the parent plant); these can be dug up and used to propagate new plants or cut off below soil level to contain the spread of the plant.
How to Harvest Youngberry
Youngberries are ready to harvest when they are firm and fully coloured. Harvest fruit by pulling them gently off the plant. Youngberries are best eaten soon after harvest. They can be stored short term in a container in the fridge. For longer term storage, youngberries can be frozen, canned or made into jam or sauce.
Common Problems when Growing Youngberry
Like all plants, youngberry is susceptible to some pests, diseases and other problems. Below is a list of the most common problems gardeners encounter when growing youngberry plants:
 Grey mould (Botrytis sp.) is a fungal disease that causes flowers to become mouldy and fruit to rot. Spores are transported by wind and can survive in soil or on green waste. The fungus spreads most in cool, damp weather. Prune off affected flowers and fruit, water plants at soil level (not on leaves) and if necessary spray with an appropriate fungicide or homemade spray.
 Queensland Fruit Fly (Bactrocera tryoni) that lays its eggs in fruit, causing it to rot from the inside. Fruit will fall prematurely and larvae can be seen if affected fruit is cut open. Practice good garden hygiene by disposing of fallen fruit, protect fruit with insect exclusion netting and install traps to monitor fruit fly populations. Read more about Queensland fruit fly here.
 Possums, birds and other animals can ruin a large percentage of your harvest overnight. Physically exclude pests by using netting or cages, or try spraying plants with a pungent homemade spray made from garlic, fish oil or mustard.
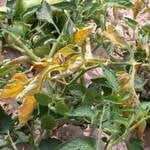
 Fusarium wilt and verticillium wilt are diseases caused by soil-borne fungi. The fungi enter a plants’ roots and prevent water and nutrients from moving through plants. Leaves and branches will wilt, dry off and die and leaves may yellow. There is no cure for wilt but choosing resistant varieties, disposing of affected plants and soil, practicing good garden hygiene and crop rotation will all help to prevent it spreading.
 Thrips are black, beige or white flying insects (<1.5mm) with larvae that suck tissue from leaves and petals, leaving behind very small white or transparent markings. While not usually causing serious damage, the marks affect the look of flowers and foliage and thrips can also transfer pathogens from one plant to another. Wash thrips from affected plants using a garden hose, encourage predatory mites and lacewings with companion planting, or spray with soap, eco-oil or neem oil.
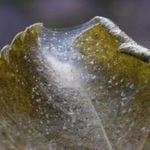
 Spider mites (Tetranychus urticae), also known as two spotted mites, are sap-sucking arachnids that cause dry, wilted or discoloured leaves. The undersides of leaves may feel dry and a little like fine sandpaper. Prune plants to allow good air flow or spray with eco-oil or wettable sulphur. Learn more about managing spider mites here.


.png)


