How to Grow Sweet Potato Tubers
Grow Guide #2346
Family: Convolvulaceae
Binomial name: Ipomoea batatas
Life Cycle: Perennial
This 'How to Grow' guide details everything a home gardener needs to know to plant, grow and care for Sweet Potato (Ipomoea batatas).
(This guide provides instructions on how to grow sweet potato from tubers. Tubers are the swollen roots of sweet potato plants. While you can plant the tubers directly in the garden, growing 'slips' from the tubers can give you a more productive crop. Slips are shoots that grow from the tuber that are cut and then planted in the garden.)
When to Grow Sweet Potato Tubers
Sweet potato tubers will grow shoots in a warm environment. Cuttings taken from the shoots can be planted in spring and early summer after all danger of frost has passed. Use the table below to identify the best time of year to grow and plant sweet potato in your climate.
| JAN | FEB | MAR | APR | MAY | JUN | JUL | AUG | SEP | OCT | NOV | DEC | |
|---|---|---|---|---|---|---|---|---|---|---|---|---|
| Cool | ||||||||||||
| Temperate | ||||||||||||
| Sub-Tropical | ||||||||||||
| Tropical | ||||||||||||
| Arid |
Preparation
Sweet Potato plants are best grown in full sun or part shade. Choose a location that will receive at least 3 hours of full sun each day.
Sweet Potato plants need a loose, well drained soil enriched with organic matter. Prepare soil by weeding it thoroughly, digging it over to at least a spade’s depth to loosen the soil, and adding aged animal manure or compost. Organic matter can be dug into heavy soil to lighten it so roots can grow freely. Keep the area free of weeds until planting. Learn more about preparing soil for planting here.
How to Grow Sweet Potato
Growing sweet potato is a two-step process. First grow shoots and take cuttings from the tuber, then plant and care for the cuttings.
Shoots can be grown by placing the tuber in either water or soil.
Soil Method
- Fill a seedling tray or 20cm pot with free-draining potting mix. The potting mix should be moist but not wet.
- Lay the tuber horizontally on the potting mix and half bury it in the mix.
- Place the container in a warm, well lit position. Placing the container on a heat mat will speed up the formation of shoots.
- Keep the soil moist.
- When shoots are 15-20cm tall, use a clean sharp knife to cut them off the tuber or twist them off at the base.
Water Method
- Fill a clean glass or jar with tap water.
- Determine which end of the tuber is the root end. The root end is narrow and tapered, and there may be some roots visible. There may be small eyes visible on the sprouting end.
- Use toothpicks inserted into the tuber about halfway along it's length to suspend the tuber in the jar; the root end of the tuber should be pointing down and submerged in the water.
- Place the jar in a warm, well lit position. Replace the water weekly or as needed.
- Roots will grow first, followed by shoots.
- When shoots are 15-20cm tall, use a clean sharp knife to cut them off the tuber.
Cuttings can be planted directly in the garden or put in a jar of water to grow roots. To learn how to root cuttings in water, click here.
How to Plant Sweet Potato Cuttings
Do not plant until all danger of frost has passed.
- Remove the bottom sets of leaves from the cutting, leaving just the top set on the plant.
- Dig a 7-10cm deep hole and plant the cutting horizontally. Make sure at least one leaf node (the point on the stem where leaves were removed) is buried.
- Cover with soil. Water in well.
- Space cuttings 30cm apart, with rows 75cm apart.
Sweet Potato plants may need watering during the growing season. Water when the soil is dry about 5cm below the surface (test this by scratching away a little soil with your finger). Water deeply in the early morning or late afternoon. Avoid watering the leaves of plants to avoid fungal diseases. Learn more about watering here.
If soil was well prepared no extra fertiliser should be necessary. Fertilising can result in excessive leaf growth at the expense of roots forming. In poor soil use a fertiliser low in nitrogen and high in phosphorus, such as blood and bone, applied at the recommended rate.
How to Harvest Sweet Potato
Sweet Potato should be ready to harvest in approximately 120 days.
Tubers are ready to harvest when the leaves of the plant begin to turn yellow. Use a garden fork to gently lift the tubers, taking care not to damage them. Shake off excess soil. Alternatively, you can ‘bandicoot’ the tubers gradually by digging carefully to unearth just a few tubers at a time. Cure tubers by placing them in a warm, dry place for 10-14 days. Store in a dark, cool well ventilated space, checking regularly for rot.
Tubers can be left in the ground over winter in warm climates. In cold climates, slips or cuttings can be taken in late autumn and grown indoors or under cover to replant in spring.
Common Problems when Growing Sweet Potato
Like all plants, sweet potato is susceptible to some pests, diseases and other problems. Below is a list of the most common problems gardeners encounter when growing sweet potato plants:
%20(2).jpg) Rotten tubers are caused by pathogens entering tubers after sitting in cold, wet soil or being temporarily waterlogged. Tubers may show obvious signs of rot, have no roots or shoots, or produce stunted yellow leaves. Plant tubers in free-draining soil, raised garden beds or containers, and do not water them until shoots emerge. In heavy soils, lift and store tubers over winter and replant in spring.
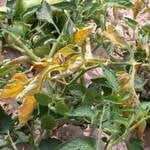
Rotten tubers are caused by pathogens entering tubers after sitting in cold, wet soil or being temporarily waterlogged. Tubers may show obvious signs of rot, have no roots or shoots, or produce stunted yellow leaves. Plant tubers in free-draining soil, raised garden beds or containers, and do not water them until shoots emerge. In heavy soils, lift and store tubers over winter and replant in spring. Fusarium wilt and verticillium wilt are diseases caused by soil-borne fungi. The fungi enter a plants’ roots and prevent water and nutrients from moving through plants. Leaves and branches will wilt, dry off and die and leaves may yellow. There is no cure for wilt but choosing resistant varieties, disposing of affected plants and soil, practicing good garden hygiene and crop rotation will all help to prevent it spreading.
 Frost damage can cause leaves to wilt and go black. Do not plant seedlings in the garden until all danger of frost has passed in spring, and harvest plants before winter. Prune all frost-damaged leaves to avoid them rotting on the plant.


.png)


